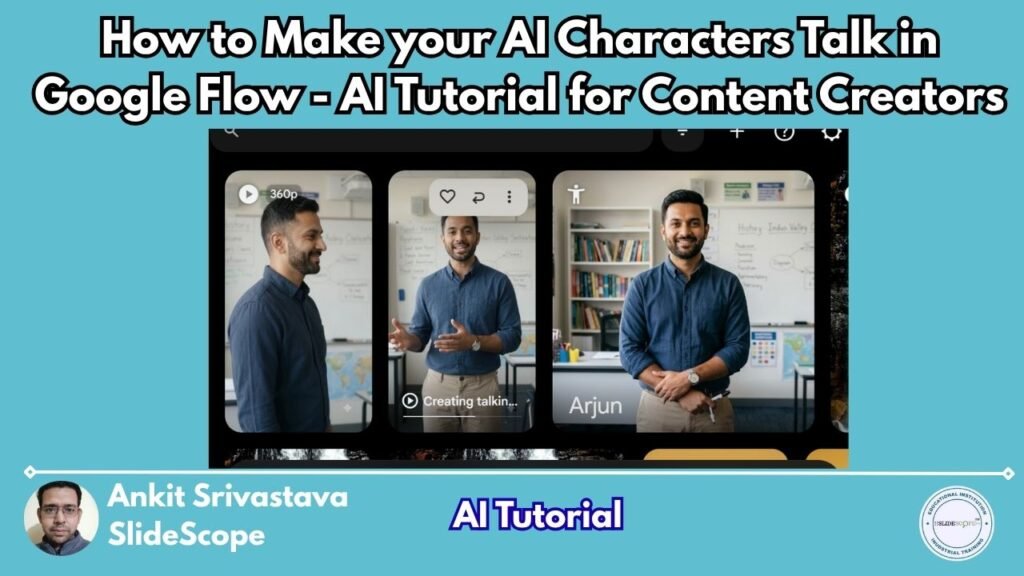
Google Flow has become much more useful for creators who want to build recurring AI characters. Instead of generating a random person every time, you can create a character inside a Flow project, give that character a name and voice, and then use the character as a reference when generating video.
In this tutorial, we will create a character first, add that character to our video prompt, and then generate a video where the character speaks directly to the camera.
The workflow is simple:
Create Project → Create Character → Add Character to Prompt → Select Video → Write Prompt → Select Model & Settings → Generate
Google Flow officially supports reusable characters with visual and audio references, so the same character can be used across multiple generations.
1. Create a New Project in Google Flow
Open Google Flow and create a new project.
Think of a project as the workspace for your video. You can keep your character, generated images, video clips and other assets together inside the same project.
For this tutorial, we are going to create a simple presenter character who can be used for educational or social media videos.
Once the project opens, you will see the main Flow workspace and the generation area.
Don’t start by immediately generating the video.
The first thing we want is our reusable character.
2. Create Your AI Character
On the left side of the Flow interface, go to Characters.
Choose New Character.
Google Flow allows you to describe the character and generate the visual reference that will become part of that reusable character. A character needs at least one image to be used. You can also provide one or two images showing the character’s appearance.
For our example, let’s create a technology presenter.
Character Prompt
A friendly Indian male technology presenter, 32 years old, medium build, short neatly styled black hair, neatly trimmed beard, expressive brown eyes, wearing a dark blue casual shirt and beige trousers. He has a confident but approachable personality and looks like a professional online technology instructor. Realistic facial features, natural skin texture, photorealistic appearance, clean modern technology studio, soft professional lighting, medium portrait shot, looking directly toward the camera, realistic cinematic photography.
Generate the character.
You may get several variations depending on your settings. Choose the one that has the strongest and clearest face.
For character-based video generation, a clean reference is important. Google recommends clean subject or product references, preferably on plain or segmented backgrounds, because they give the model clearer information to work with.
3. Give Your Character a Name
Once you are happy with the character, give him a name.
Let’s call him:
Arjun
You can also select a voice for the character.
This is particularly useful if you want to use Arjun repeatedly in a series of videos.
For example, you could eventually create:
- Arjun explaining SEO
- Arjun teaching Python
- Arjun explaining AI
- Arjun reviewing software
- Arjun presenting news
- Arjun appearing in advertisements
The important idea is that Arjun becomes a reusable content asset, rather than something you recreate from scratch for every video.
Google Flow’s character system is specifically designed to bundle visual and audio references into a reusable character.
4. Add the Character to Your Prompt
Now comes the important part.
Go back to the main project.
Find the character you just created.
Click the three-dot menu on the character.
Choose the option to add the character to the prompt.
Your character is now available as a reference in the generation workflow.
You can also reference characters directly in the prompt using @ followed by the character’s name. Google’s current documentation describes this method as well.
For example:
@Arjun
Now Flow knows that when we talk about Arjun in the prompt, we are referring to our saved character rather than asking the model to invent another person.
This is one of the biggest advantages of using the Character feature.
5. Select Video
Now we need to tell Flow that we don’t want another image.
In the prompt generation area, select the generation type and choose:
Video
This changes the available settings because we are now generating moving footage.
Google Flow’s standard workflow lets you select Video and then choose the video model, aspect ratio, number of outputs and generation length.
6. Write the Talking Character Prompt
Now we need to describe what our character should actually do.
This is where many beginners make a mistake.
Don’t simply write:
Make him talk.
Give Flow information about the character, action, camera, expression and dialogue.
For our example, use this:
Talking Character Prompt
@Arjun is standing in a modern technology studio and speaking directly to the camera as a professional technology presenter. Keep his appearance, face, hairstyle, beard and clothing consistent with the character reference. He maintains natural eye contact with the camera. His facial expressions change naturally while speaking, with realistic blinking, subtle head movements and natural gestures. His mouth movements are synchronized with his spoken words. The camera remains mostly stationary in a medium shot. Realistic lighting, natural body movement and photorealistic cinematic appearance.
Dialogue:
“Hello everyone. In this video, I’m going to show you how AI characters can be used to create engaging videos for YouTube, social media and online education.”
The important part is that we’re not just asking for a person standing there.
We are describing what the character is doing.
7. Choose the Video Model
Now look at the model settings.
Google Flow has multiple models, and different models support different video features. The available options and capabilities can change, so always check the model selector inside Flow before generating.
For example, current Flow documentation lists Veo 3.1 variants and Gemini Omni models with different combinations of duration, resolution and features.
This matters because you shouldn’t assume that every model supports every feature.
If your talking-character workflow requires voice references, for example, Google currently documents voice references with Gemini Omni Flash when using ingredients.
So before pressing Generate, check:
Model → Resolution → Aspect Ratio → Number of Outputs → Generation Length
8. Choose the Resolution
Choose the resolution appropriate for your final video.
If you are making a normal YouTube tutorial, you can work with a landscape format.
For Shorts, Reels or TikTok-style content, choose a vertical orientation where supported.
The important thing is to decide this before generating, because changing the aspect ratio later may require another generation.
Google Flow’s current video settings include orientation/aspect ratio, number of outputs, model and generation length, depending on the selected model.
9. Generate the Video
Now everything is ready.
You have:
Project
↓
Character
↓
Character added to prompt
↓
Video selected
↓
Talking-character prompt
↓
Model selected
↓
Resolution and other settings
↓
Generate
Click Generate.
Flow will now create the video using your character reference and the instructions you’ve provided.
The result should show Arjun speaking directly to the camera.
Don’t worry if your first generation isn’t perfect.
AI video generation is still iterative.
You may need to adjust the prompt.
10. How to Improve the Result
Suppose the character looks good but the movement is too exaggerated.
Change the prompt to:
Keep the character’s movements subtle and realistic. Avoid exaggerated hand gestures. Maintain natural eye contact with the camera and use only small head movements while speaking.
If the character doesn’t appear expressive enough:
Use natural facial expressions that match the meaning and emotion of the dialogue. Include subtle eyebrow movement, natural blinking and slight changes in facial expression.
If the camera moves too much:
Use a locked-off medium camera shot with minimal camera movement.
If the character looks different:
Maintain the exact identity and appearance of @Arjun from the character reference. Do not change his facial structure, hairstyle, beard, clothing or age.
This is why the reusable character system is valuable.
You’re giving Flow a persistent reference instead of repeatedly describing the person from scratch.
11. Create Different Talking Videos With the Same Character
Now comes the really interesting part for content creators.
You don’t need to stop after one video.
You can keep using @Arjun.
For example:
Video 1 — Introduction
@Arjun explains why artificial intelligence is changing video production.
Video 2 — Tutorial
@Arjun demonstrates how to create an AI video using Google Flow.
Video 3 — Advertisement
@Arjun presents a new software product in a professional commercial-style video.
Video 4 — Educational Content
@Arjun explains three common SEO mistakes to a beginner audience.
Video 5 — Social Media
@Arjun gives a 10-second productivity tip directly to the viewer.
This gives you something extremely useful:
Character continuity.
Instead of having a different presenter in every AI-generated video, you can build your own recurring digital presenter.
12. Where Content Creators Can Actually Use This
This is probably the most important part of the tutorial.
A talking AI character isn’t useful just because it looks impressive.
You need a reason to use one.
YouTube Educational Channels
A recurring AI presenter can introduce concepts, explain tutorials and present short educational segments.
For example:
“Today we’re going to learn three Python functions every beginner should know.”
You can generate several short clips and edit them together with screen recordings.
Faceless YouTube Channels
If you don’t want to appear on camera yourself, a reusable AI presenter can become the visual personality of your channel.
You could combine:
AI Presenter + Screen Recording + B-roll + Graphics
This is much more interesting than having narration over random stock footage.
Product Demonstrations
Suppose you run a SaaS company.
Instead of recording yourself every time, your character can introduce the product:
“Let me show you how this feature works.”
Then cut to your actual screen recording.
This can make software tutorials feel more like professionally produced videos.
Social Media Reels
Short-form content is another obvious use.
Create one character and use that character for a recurring series.
For example:
“AI Tip of the Day with Arjun”
Every video starts with the same presenter.
That creates a recognizable visual identity.
Advertisements
You can also use a character to create quick advertising concepts.
For example:
Character introduces the problem → product appears → character explains the solution → call to action.
This can be particularly useful when you need multiple creative variations for advertising.
Online Courses
This is another strong use case.
Imagine creating a course where the same AI instructor introduces every lesson.
You could have:
Lesson 1 — Introduction
Lesson 2 — Basic Concepts
Lesson 3 — Practical Example
Lesson 4 — Assignment
The character provides consistency across the course.
Important Note for Creators
Don’t use AI characters simply to replace every piece of real footage.
The best results will usually come from combining the AI presenter with other content.
For example:
Presenter → Screen recording → Presenter → Demonstration → Presenter → Final result
This keeps the video moving.
Also, don’t try to make a 10-minute AI-generated talking-head clip in one generation. Current Flow video generation is clip-based, with supported durations depending on the selected model and feature. Google’s current documentation lists 4-, 6-, 8- and 10-second generations for some models, while other features have different limits.
So think of the character as a building block.
Generate short clips, then assemble them into the final video.
Final Workflow
So the complete Google Flow workflow is:
1. Create a Project
↓
2. Go to Characters
↓
3. Create your character
↓
4. Generate the character image
↓
5. Give the character a name and voice
↓
6. Open the character’s three-dot menu
↓
7. Add the character to your prompt
↓
8. Select Video
↓
9. Write the action + dialogue prompt
↓
10. Select the appropriate model
↓
11. Choose resolution/orientation
↓
12. Select generation length and outputs
↓
13. Generate
↓
14. Review the result
↓
15. Refine the prompt if necessary
The real power isn’t simply “making an AI person talk.”
It’s creating a reusable digital character that you can bring back into different videos, scenes and content formats while maintaining a recognizable identity. Google Flow’s current character and reference workflow is designed specifically around that kind of reusable media creation.
Creator tip: For your own tutorial video, don’t spend 10 minutes explaining every Flow setting. Show the complete workflow once, then spend most of the video demonstrating the character → three dots → add to prompt → Video → prompt → model/settings → Generate process on screen. That’s the part viewers will actually want to copy.

Ankit Srivastava is an IT trainer, technology educator, and digital skills mentor with expertise in programming, data analytics, AI, and software development. He has successfully trained thousands of learners, with more than 10,000 student enrollments on Udemy. His practical teaching approach empowers students and professionals to build in-demand technical skills. Colorstech channel where Ankit posts video tutorials has more than 8000 Subscribers.