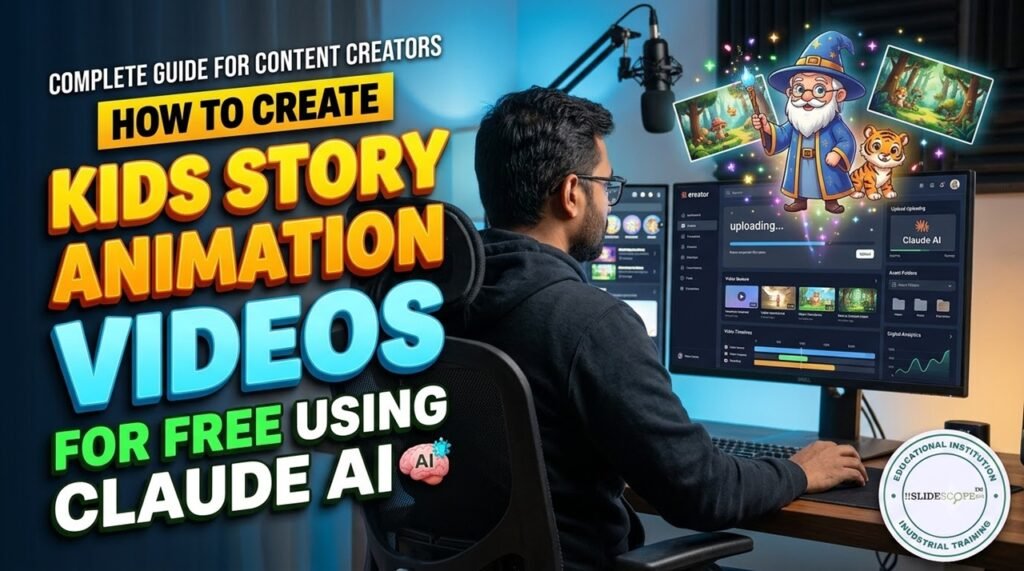
The concept: Use Claude’s simple chat interface to create a complete 15-second animated kids’ story video, including characters, animated scenes, Hindi or English voiceover, background music, subtitles and a downloadable MP4 file.
This tutorial is designed for YouTube Shorts creators, Instagram Reels creators, educators, children’s content creators and anyone who wants to experiment with animated storytelling without purchasing expensive animation software.
One important advantage is that you don’t need to know Python, JavaScript, video editing or animation. You will give Claude a detailed instruction, and it will handle the technical workflow using code execution and suitable open-source libraries
1. Introduction: Why Create Kids’ Story Animation Videos?
Children’s storytelling is an interesting content category for digital creators. Short animated stories can communicate simple lessons, introduce characters, entertain young audiences and create recurring content series.
Traditionally, creating an animated video requires several different activities:
- Writing a short story and dialogue.
- Designing characters.
- Creating backgrounds.
- Animating characters and objects.
- Recording voiceovers.
- Adding sound effects and background music.
- Synchronizing subtitles with narration.
- Rendering and exporting the final video.
Even a 15-second animation can require considerable effort if everything is done manually.
This is where Artificial Intelligence can help.
Instead of learning several animation and editing applications, you can use Claude to generate the story, write the code, prepare the animation scenes, create narration and assemble the final video.
The interesting part is that Claude’s free version now supports code execution and file creation, subject to its usage limits and enabled capabilities. This means you can ask Claude to work with code and generate files directly through a conversation.
For this experiment, we will use Claude as an AI-powered animation production assistant.
2. What Do You Need Before Starting?
You don’t need a powerful computer or professional video editing software.
Here is what you need:
| Requirement | Tool |
|---|---|
| AI assistant | Claude Free |
| Interface | Claude Web Chat |
| Animation creation | Python |
| Image generation and drawing | Pillow |
| Video composition | MoviePy |
| Audio processing | FFmpeg |
| Voice generation | Edge TTS or gTTS |
| Video output | MP4 |
These are open-source Python libraries or freely accessible tools. Some voice-generation services require an internet connection.
You should also enable Claude’s file creation and code execution capabilities.
How to enable it:
- Open Claude in your browser.
- Log in using your free account.
- Open Settings.
- Navigate to Capabilities.
- Enable Code execution and file creation (also labelled Create and edit files in some interfaces).
- Ensure network access is available if the workflow needs to install additional packages.
Claude operates in an isolated computing environment. It can install packages from approved sources when network access is available, but it cannot automatically install software on your personal computer.
This distinction is important because all our rendering will happen inside Claude’s available execution environment.
3. Understanding the Animation Workflow
Before using the main prompt, let’s understand what we want Claude to accomplish.
We are not simply asking Claude to write a story or generate an image. We are asking it to produce a complete animated video.
The workflow has seven major stages.
Stage 1: Story Generation
Claude will automatically create a short, child-friendly story.
For example:
A little rabbit finds a lost baby bird in a forest. The rabbit helps the bird return to its mother. The story concludes with a simple moral about kindness.
The story should be short enough to fit into 15 seconds.
Stage 2: Character Design
Claude will create cartoon characters using programmatic drawing or generated visual assets where available.
We want consistent characters throughout the video.
For example:
- A cute white rabbit with large expressive eyes.
- A little yellow bird.
- A colourful forest background.
The characters should look consistent across all scenes.
Stage 3: Scene Creation
The story will be divided into multiple scenes.
For a 15-second video, three scenes of approximately five seconds each are a good starting point.
Each scene will have its own background, character positions, expressions and movements.
Stage 4: Animation
Claude will use Python libraries to animate the characters.
Possible animation effects include:
- Character walking.
- Characters blinking.
- Birds flying.
- Objects moving.
- Camera zooming.
- Background transitions.
- Characters waving.
These effects can be produced programmatically rather than relying on expensive animation software.
Stage 5: Voiceover Generation
The story will need narration.
We can use a text-to-speech library such as Edge TTS or gTTS, depending on connectivity and availability.
For this tutorial, we will use Hindi narration as the default, although the prompt can be modified for English or other languages.
Stage 6: Audio and Subtitle Synchronization
The generated voiceover will be synchronized with the scenes.
Claude will also add subtitles, background music and suitable sound effects.
Background music should remain quieter than the narration.
Stage 7: Final MP4 Export
Finally, Claude will combine all the scenes, voiceover, subtitles and sound effects.
The target output will be:
- Format: MP4
- Duration: 15 seconds
- Resolution: 1080 × 1920
- Aspect ratio: 9:16
- Audio: Included
- Subtitles: Included
The final video should be downloadable directly from the conversation if the execution environment successfully creates the file.
4. The Main Prompt: Create a Complete Kids Animation Video
This is the most important part of the tutorial.
You don’t need to manually install every library or write individual Python scripts.
Instead, copy the following prompt and paste it into a new Claude conversation.
The prompt instructs Claude to inspect its available environment, install the required dependencies where possible, create the animation, generate narration and export the final video.
It also includes instructions for troubleshooting errors rather than stopping after generating code.
MASTER PROMPT: Create a 15-Second Kids Story Animation Video
Act as a professional children’s animation director, Python developer, cartoon character designer, sound designer and video editor.
Your task is to create a complete, original, 15-second animated children’s story video with voiceover, background music, sound effects and synchronized subtitles.
I want the final result as a downloadable MP4 video file, not just code, instructions, images or a preview.
1. First: Inspect Your Environment
Before starting:
- Inspect the available Python environment and installed packages.
- Check whether FFmpeg is available.
- Check whether internet access and package installation are available.
- Identify suitable installed libraries and available tools.
- Install missing dependencies from trusted package repositories where permitted.
Use suitable open-source libraries, including:
- Pillow for drawing characters, backgrounds and visual elements.
- MoviePy for video editing and composition.
- NumPy for animation calculations.
- FFmpeg or imageio-ffmpeg for video encoding.
- Edge TTS or gTTS for voiceover generation.
- Any other suitable open-source library required for the task.
Do not install unnecessary packages.
Do not assume that a package, skill, extension or external service is available. Verify its availability before using it. If a particular skill is unavailable, complete the task using your existing capabilities and libraries.
2. Generate an Original Children’s Story
Automatically create an original, entertaining and child-friendly story.
Requirements:
- Duration: Exactly 15 seconds.
- Language: Hindi.
- Storytelling style: Simple, engaging and entertaining.
- Audience: Children aged 3–10.
- Include a positive moral or educational message.
- Use no copyrighted cartoon characters or existing franchise characters.
- Keep narration short enough to fit naturally within 15 seconds.
Choose the story yourself. Do not ask me to provide one.
3. Create Cartoon Characters
Design 2–3 original cartoon characters suitable for children’s animation.
Visual requirements:
- Cute, colourful and expressive characters.
- Large expressive eyes.
- Attractive cartoon appearance.
- Consistent character appearance across all scenes.
- Suitable facial expressions and body movements.
- Colourful backgrounds and child-friendly environments.
Create the character graphics programmatically using Pillow, SVG or another suitable available technique.
If image-generation capabilities are available in the environment, you may use them, but do not depend on an unavailable external API.
4. Create Three Animated Scenes
Divide the story into three scenes, approximately five seconds each.
Each scene must include:
- A suitable background.
- The required characters.
- Character movement.
- Facial expressions.
- Camera movement or zoom effects.
- Appropriate transitions.
Use actual frame-by-frame animation rather than presenting three static images as a slideshow.
Include movements such as:
- Walking.
- Running.
- Blinking.
- Waving.
- Jumping.
- Flying.
- Moving objects.
- Camera zooming.
Maintain consistent characters, colours and visual style throughout the video.
5. Generate Hindi Voiceover
Generate a natural-sounding Hindi voiceover for the complete story.
Requirements:
- Child-friendly storytelling delivery.
- Clear Hindi pronunciation.
- Warm and expressive narration.
- Appropriate speaking speed.
- Voiceover must fit the 15-second timeline.
First try Edge TTS using an available Hindi voice.
If Edge TTS is unavailable, try gTTS or another suitable available free text-to-speech solution.
If external connectivity is unavailable, investigate a locally available TTS option.
Do not silently substitute a missing voiceover with an empty audio track.
6. Add Background Music and Sound Effects
Add suitable background music.
Use original, generated or appropriately licensed audio only.
Include subtle sound effects where appropriate, such as:
- Birds chirping.
- Footsteps.
- Magical sparkle sounds.
- Character movement sounds.
Keep background music and sound effects below the narration volume.
The narration must remain clearly audible.
7. Add Animated Subtitles
Add Hindi subtitles synchronized with the narration.
Requirements:
- Large, readable typography.
- White or yellow text with a dark outline.
- Proper Hindi Unicode font support.
- Suitable positioning in the lower portion of the video.
- Avoid covering characters’ faces.
- Keep subtitles inside the vertical video safe area.
8. Video Specifications
Create the final video using these specifications:
- Duration: Exactly 15 seconds.
- Resolution: 1080 × 1920.
- Aspect ratio: 9:16.
- Frame rate: 30 FPS.
- Video format: MP4.
- Video codec: H.264.
- Audio codec: AAC.
- Audio: Hindi narration, background music and sound effects.
- Subtitles: Burned into the video.
9. Rendering and Quality Checks
Render the video using the available tools.
After rendering:
- Verify that the MP4 file exists.
- Check its actual duration.
- Check resolution and frame rate.
- Confirm that the audio track exists.
- Confirm that the narration is synchronized with the scenes.
- Check that subtitles are visible.
- Check for rendering errors and missing frames.
If any error occurs, diagnose it, modify the code and retry.
Do not report a successful export unless the file has actually been created and verified.
10. Final Deliverables
Save the final video as:
kids_story_animation.mp4
Also provide:
- The downloadable MP4 file.
- The story script.
- The voiceover script.
- A brief description of the animation.
- The Python source code used to generate the video.
Most importantly, prioritize creating the actual MP4 video with voiceover included.
Do not stop after writing code. Execute the workflow, render the video, verify the output and provide the downloadable file.
If any required capability is unavailable, explain the specific limitation and complete as much of the workflow as possible without pretending that the video has been successfully exported.
5. What Happens After You Submit the Prompt?
Once you paste the prompt into Claude, it should begin by checking the available execution environment.
You may see it:
- Inspecting the installed Python packages.
- Checking FFmpeg availability.
- Installing missing libraries.
- Writing Python scripts.
- Creating character graphics.
- Generating the Hindi narration.
- Combining animation and audio.
- Rendering the MP4.
Depending on the complexity of the animation and available execution resources, this may take several minutes.
If Claude encounters an error, it should attempt to fix the issue and rerender the video.
Important: Claude’s free code-execution environment can create files, but it has resource and time limitations. A 15-second video is a reasonable experiment, not a guaranteed one-click outcome. The dedicated Claude Motion template, which has a native MP4 animation export workflow, is currently listed for Team and Enterprise plans rather than Free. Our prompt instead uses Python-based rendering. Claude Help Center+1
6. How Can Content Creators Use This Workflow?
Once you successfully create your first video, you can experiment with different story categories.
- Moral stories: Teach kindness, honesty and sharing.
- Animal stories: Create adventures featuring rabbits, elephants, lions and birds.
- Bedtime stories: Create calm, short bedtime animations.
- Educational stories: Teach colours, numbers, shapes and basic concepts.
- Mythological-inspired stories: Create original, respectful stories inspired by traditional folklore without copying copyrighted adaptations.
You can also experiment with Hindi, English and other languages to reach different audiences.
7. Tips for Getting Better Results
Maintain character consistency: Reuse the same character descriptions, colours and design references when creating a series.
Keep the narration short: Fifteen seconds is not enough for a complicated story. Focus on one situation, one interaction and one conclusion.
Use vertical videos: The 9:16 format is suitable for YouTube Shorts and Instagram Reels.
Check the voiceover: Always listen to the generated narration before publishing. Incorrect pronunciation can reduce the quality of children’s content.
Review every frame: Check character movements, subtitle positioning and transitions before uploading.
Be careful with music: Use original or properly licensed music, particularly when publishing monetized content.
8. Conclusion
Creating children’s animated stories no longer necessarily requires professional animation software, expensive equipment or a dedicated editing team.
With Claude’s free chat interface, code execution and open-source Python libraries, content creators can experiment with creating short animated videos through natural-language instructions.
The interesting aspect of this workflow is that Claude can handle multiple production stages, from writing the story to preparing character graphics, generating narration and assembling the video.
Start with a simple 15-second story. Once you understand the process, experiment with different characters, languages, storytelling styles and animation effects.
For content creators looking to build a consistent children’s storytelling channel, this is an interesting workflow to explore.
The goal is simple: write one prompt, let Artificial Intelligence handle the production workflow, review the result and publish your animated story.
9. What You Should Expect From the Final Video
The target output is a short animated cartoon with:
- Three connected animated scenes.
- Original cartoon characters.
- Hindi storytelling voiceover.
- Background music and sound effects.
- Synchronized subtitles.
- Downloadable MP4 output.
My recommendation for your live demonstration: Start with the rabbit-and-bird story. It is simple enough to demonstrate character creation, movement, narration and scene transitions within 15 seconds.
One technical clarification: this workflow creates programmatic cartoon animation, not automatically a high-end 3D studio animation. You can improve its appearance by using generated character images as visual assets in a later version.

Ankit Srivastava is an IT trainer, technology educator, and digital skills mentor with expertise in programming, data analytics, AI, and software development. He has successfully trained thousands of learners, with more than 10,000 student enrollments on Udemy. His practical teaching approach empowers students and professionals to build in-demand technical skills. Colorstech channel where Ankit posts video tutorials has more than 8000 Subscribers.