By Ankit Srivastava
IT Trainer, AI/ML Developer, and Technology Educator
Introduction: Why Ollama Matters for Modern Developers
Over my years of building applications—from ERPs like our Hospital Management System to custom AI integrations for client projects—I’ve learned that having the ability to run Large Language Models (LLMs) locally can be a game-changer. Ollama is a powerful tool that allows you to run open-source language models on your own machine without relying on cloud APIs. This means faster development, lower costs, complete privacy, and no dependency on third-party services.
Whether you’re building chatbots for your applications, creating intelligent data analysis tools, or developing educational content (as I’ve done for my 10,000+ Udemy students), Ollama provides the flexibility you need. In this tutorial, I’ll walk you through the complete process of installing Ollama and show you how to integrate it into your development workflow.
What is Ollama? Understanding the Basics
Ollama is an open-source framework that makes it incredibly easy to download and run large language models locally. Unlike cloud-based solutions like OpenAI’s API, Ollama lets you:
- Run models offline – No internet required after download
- Maintain privacy – Your data stays on your machine
- Save costs – No per-request API charges
- Customize models – Create fine-tuned versions for specific tasks
- Develop faster – Zero latency compared to network-based APIs
When I was consulting on data analytics for a Belgium-based multinational company, one of our key challenges was processing sensitive client data without sending it to external servers. Ollama would have been perfect for that scenario. Now, I integrate it into various projects where privacy and autonomy are critical.
System Requirements: Do You Have What It Takes?
Before installing Ollama, ensure your system meets these requirements:
Minimum Requirements:
- RAM: 8GB minimum (16GB recommended)
- Storage: At least 10-20GB free space for models
- OS: macOS, Windows, or Linux (I primarily use Ubuntu for development)
- GPU Support: Optional but recommended (NVIDIA CUDA, Apple Metal, or AMD ROCm)
My Experience: For the 24 client apps I’ve developed, many use local LLMs for processing. Systems with GPU acceleration (like NVIDIA cards) can run larger models smoothly, while CPU-only machines work fine for smaller models like Mistral 7B.
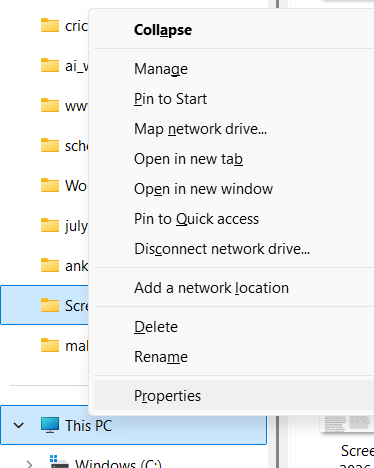
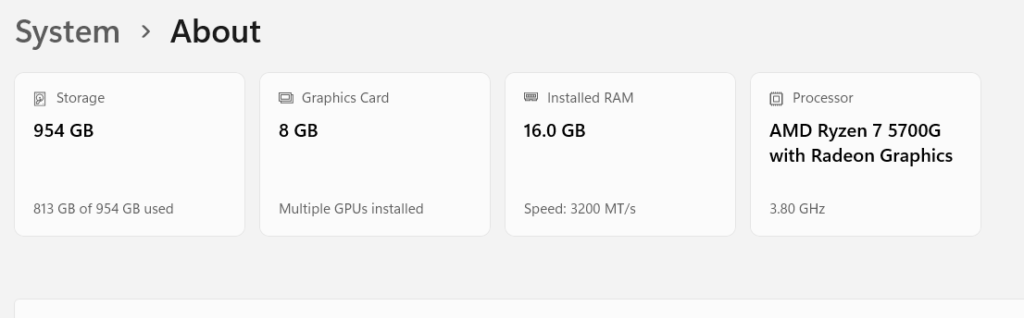
How to check your systems configuration?
Step 1 See Properties:
See your systems configuration:
Step 1: Downloading Ollama
The installation process is straightforward. Head to the official website:
Visit https://ollama.ai/
You’ll see download options for:
- macOS (Apple Silicon and Intel)
- Windows (10 and 11)
- Linux (Ubuntu and other distributions)
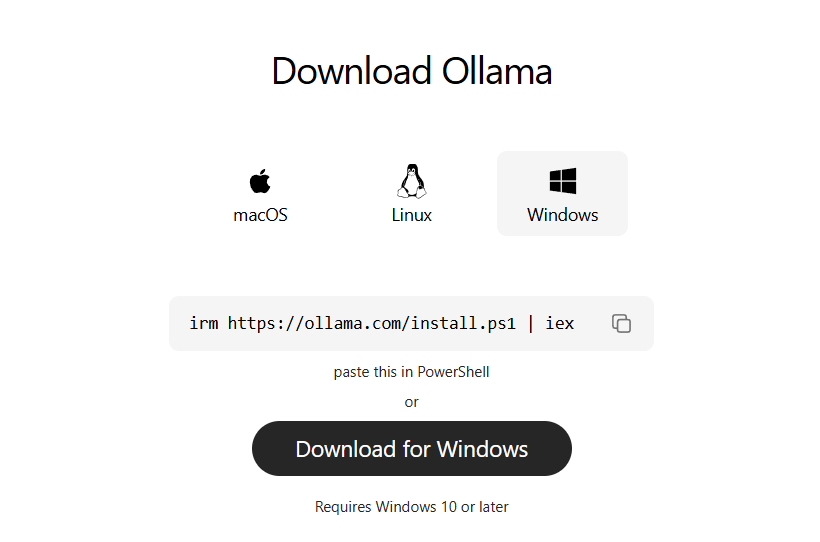
For Windows Users:
- Click the “Download for Windows” button
- The installer file (around 300MB) will download
- Save it to your Downloads folder
For macOS Users:
- Choose between Apple Silicon (M1/M2/M3) or Intel Mac
- Download the appropriate version
- The installation is automatic upon opening the DMG file
For Linux Users:
curl https://ollama.ai/install.sh | sh
This one-liner handles everything automatically.
Step 2: Installation Process – Detailed Walkthrough
Windows Installation:
- Locate the installer in your Downloads folder (look for
OllamaSetup.exe) - Run the installer by double-clicking it
- Follow the installation wizard:
- Accept the terms and conditions
- Choose installation directory (default is fine:
C:\Users\[YourUsername]\AppData\Local\Ollama) - Complete the installation
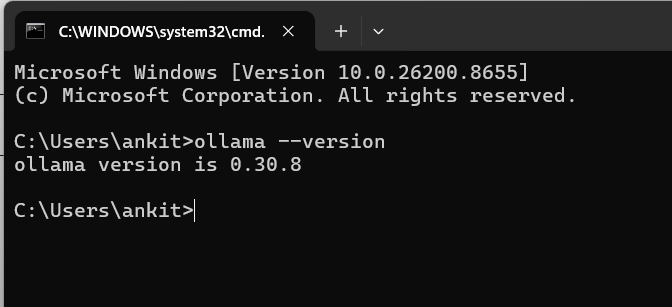
- Verify installation:
- Open Command Prompt or PowerShell
- Type:
ollama --version - You should see the version number
macOS Installation:
- Open the DMG file you downloaded
- Drag Ollama icon to the Applications folder
- Wait for copy to complete
- Launch Ollama from Applications or Spotlight (Cmd + Space, type “Ollama”)
- Verify via Terminal:
ollama --version
Linux Installation (Ubuntu/Debian):
After running the install script above:
ollama --version
If you encounter permission issues, use:
sudo usermod -aG ollama $USER
Then log out and back in.
Step 3: Understanding and Downloading Models
Ollama comes with an extensive library of models. Think of models like different specialized tools—some are lightweight and fast, others are powerful but resource-intensive.
Popular Models for Different Use Cases:
| Model | Size | Best For | VRAM Needed |
|---|---|---|---|
| Mistral 7B | 4GB | General tasks, coding | 8GB RAM |
| Llama 2 7B | 4GB | Conversational AI | 8GB RAM |
| Neural Chat | 4GB | Customer support, chatbots | 8GB RAM |
| Dolphin Mixtral | 26GB | Advanced reasoning | 16GB+ RAM |
| Orca Mini | 2GB | Lightweight tasks | 4GB RAM |
Browse available models:
[Link here: https://ollama.ai/library]
In my experience building the 8 apps for Slidescope (available on Google Play), I found that smaller models like Mistral 7B offer the best balance between speed and quality for mobile-like applications.
Step 4: Downloading Your First Model
Let’s start with Mistral, which is excellent for learning:
- Open Terminal/Command Prompt
- Run this command:
ollama pull mistral
This downloads the Mistral 7B model (approximately 4GB). The download progress will show in your terminal.
pulling manifest
pulling 8ddc845c27c7... 100% ████████████████ 3.8 GB
verifying sha256 digest
writing manifest
removing any unused layers
success
- Wait for completion – Depending on your internet speed, this might take 5-15 minutes
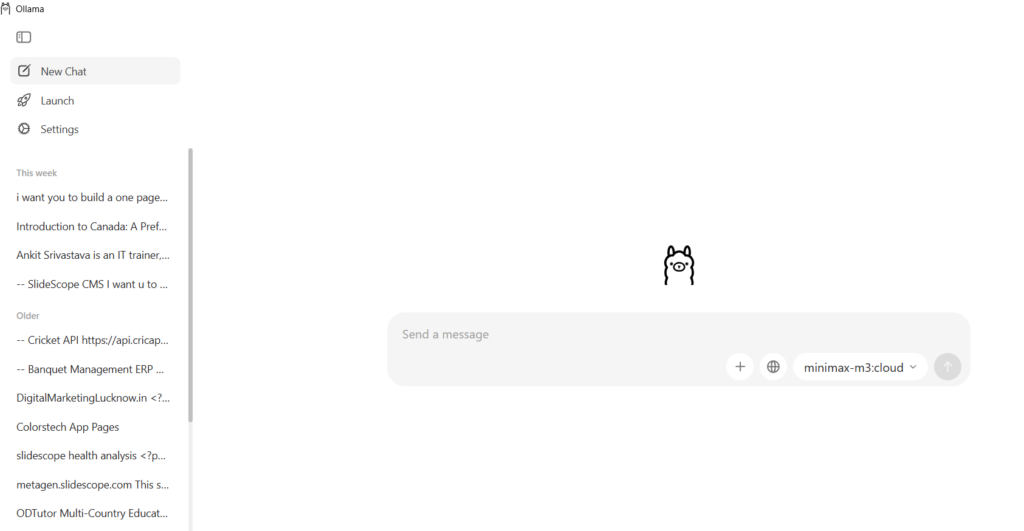
Step 5: Running Your First Model
Once downloaded, running a model is simple:
ollama run mistral
You’ll see:
>>> Send a message (/? for help)
Now you can chat! Try typing:
>>> What is artificial intelligence?
The model will respond directly in your terminal. Type /exit to quit.
Step 6: Coding with Ollama – The Developer Part
This is where it gets exciting. Ollama provides a REST API that you can integrate into your applications.
Using Ollama with Python (My Preferred Language)
Create a file called ollama_app.py:
import requests
import json

# Ollama API endpoint
API_URL = "http://localhost:11434/api/generate"

def query_ollama(prompt, model="mistral"):
    """
    Query Ollama locally and get a response
    """
    payload = {
        "model": model,
        "prompt": prompt,
        "stream": False
    }

    response = requests.post(API_URL, json=payload)

    if response.status_code == 200:
        result = response.json()
        return result['response']
    else:
        return f"Error: {response.status_code}"

# Example usage
if __name__ == "__main__":
    user_input = "Explain data analytics in simple terms"
    answer = query_ollama(user_input)
    print(f"\nQuestion: {user_input}")
    print(f"\nAnswer:\n{answer}")
Installation Requirements:
pip install requests
Run the script:
python ollama_app.py
Using Ollama with JavaScript/Node.js
For web developers, create ollama_request.js:
const axios = require('axios');

const API_URL = 'http://localhost:11434/api/generate';

async function queryOllama(prompt, model = 'mistral') {
    try {
        const response = await axios.post(API_URL, {
            model: model,
            prompt: prompt,
            stream: false
        });

        return response.data.response;
    } catch (error) {
        console.error('Error querying Ollama:', error.message);
        return null;
    }
}

// Usage example
async function main() {
    const prompt = "How do I build a chatbot?";
    const answer = await queryOllama(prompt);
    console.log(`\nQuestion: ${prompt}`);
    console.log(`\nAnswer:\n${answer}`);
}

main();
Installation:
npm install axios
node ollama_request.js
Real-World Application: Building a Data Analytics Assistant
Based on my experience creating 300+ dashboards in Excel, Power BI, and Tableau, here’s how I’d use Ollama to build an intelligent assistant:
import requests
import json

def create_analytics_assistant():
    """
    An intelligent assistant for data analysis queries
    """
    API_URL = "http://localhost:11434/api/generate"

    analytics_context = """You are a data analytics expert who helps interpret
    dashboards and metrics. Provide insights based on data questions."""

    questions = [
        "My Power BI dashboard shows a 20% drop in sales this quarter. What could be the causes?",
        "How should I structure a Tableau dashboard for HR analytics?"
    ]

    for question in questions:
        prompt = f"{analytics_context}\n\nQuestion: {question}"

        payload = {
            "model": "mistral",
            "prompt": prompt,
            "stream": False
        }

        response = requests.post(API_URL, json=payload)
        result = response.json()

        print(f"\nQ: {question}")
        print(f"A: {result['response']}\n")

create_analytics_assistant()
This approach is similar to what I implemented when consulting on data analytics—providing intelligent, contextual responses based on specific domains.
Step 7: Advanced Tips from Real-World Development
1. Run Ollama in the Background:
- On Windows: Ollama starts automatically
- On Mac: Use
launchctlto ensure it runs on startup - On Linux: Create a systemd service
2. Performance Optimization:
# Run with GPU acceleration (NVIDIA)
ollama run mistral --gpu all

# Use CPU only if needed
ollama run mistral --gpu=0
3. Creating Custom Models: For projects like the ERP systems I’ve built, you might want to customize models:
ollama create custom-model -f Modelfile
4. API Integration Best Practices:
- Always handle timeouts
- Implement retry logic
- Cache responses when possible
- Monitor memory usage
Troubleshooting Common Issues
| Problem | Solution |
|---|---|
| “Connection refused” | Ensure Ollama is running: ollama serve |
| Out of memory | Use smaller models or increase RAM |
| Slow responses | Check GPU usage or download GPU drivers |
| Model won’t download | Check internet connection and disk space |
Conclusion: Your Journey with Local LLMs Starts Now
Installing Ollama and coding with it opens up a world of possibilities. Whether you’re building intelligent applications like the apps on Google Play, creating analytics solutions, or developing educational content for thousands of students, having local LLM capabilities is invaluable.
The beauty of Ollama lies in its simplicity—you can have a production-ready language model running on your machine within 15 minutes. As you progress, you’ll discover countless ways to integrate these models into your projects.
Start with the basics, experiment with different models, and don’t hesitate to push the boundaries. The AI revolution is here, and with Ollama, you have the tools to be part of it.
Happy coding!
Quick Reference Links
- Ollama Official Website: https://ollama.ai/
- Model Library: https://ollama.ai/library
- Community Discord: https://discord.gg/ollama
- GitHub Repository: https://github.com/ollama/ollama
For more tutorials and AI development content, visit Colorstech Youtube or check out my Udemy courses where I cover practical AI implementation for developers.
Ankit Srivastava has built 300+ dashboards, 13 ERPs, and 24 client applications integrating cutting-edge AI technologies. This guide draws from real-world experience in production environments.

Ankit Srivastava is an IT trainer, technology educator, and digital skills mentor with expertise in programming, data analytics, AI, and software development. He has successfully trained thousands of learners, with more than 10,000 student enrollments on Udemy. His practical teaching approach empowers students and professionals to build in-demand technical skills. Colorstech channel where Ankit posts video tutorials has more than 8000 Subscribers.